Sunday, December 30, 2012

My Purse


When I first had 2 year old B,  I don't think I ever left the house without her... and therefore never left the house without the big diaper bag.  There came a point in time, though, that I started venturing out without the little baby in tow and found myself throwing this light and pretty thing that I hadn't seen in months over my shoulder.  It's called a purse!!  Then at some point I discovered I didn't need the diaper bag and could just throw a few diapers and a wipes case into my purse when out and about with the little one.  But that was short lived because not too long after I put the diaper bag away, baby M arrived.

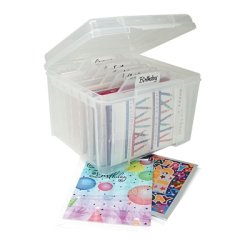
Here I am again, at the in between point of switching between diaper bag and purse on a regular basis.  I have 4 things that I always take with me when out of the house: my wallet, my cell phone, the car keys, and Chapstick (because I'm addicted).  When 2 year old B was a baby, I was always throwing these things in the diaper bag, losing them, digging around to find them, and then throwing them into my purse... and then repeat when I needed to use the diaper bag.  Then I discovered a brand of mainly baby accessories called petunia pickle bottom and fell in love!!  They have the prettiest prints for any baby and travel organizational needs.  They are way out of my price range, but, on one of those daily deals websites, I was able to purchase a Powder Room Case similar to this one:


It solved my purse/diaper bag switching issue perfectly.  I put my "always take with me" items in the case...


... and then I just move the case from diaper bag to purse as needed.  See:


This little system doesn't have to be used solely for diaper bag to purse switches, it can even be used for purse to purse change ups too... as long as you have a large enough purse!  The next purchase I would love to get from petunia pickle bottom is the Wanderlust Wallet.


I can't justify spending $62 on a wallet though, but I'm keeping my eyes out for a deal!!

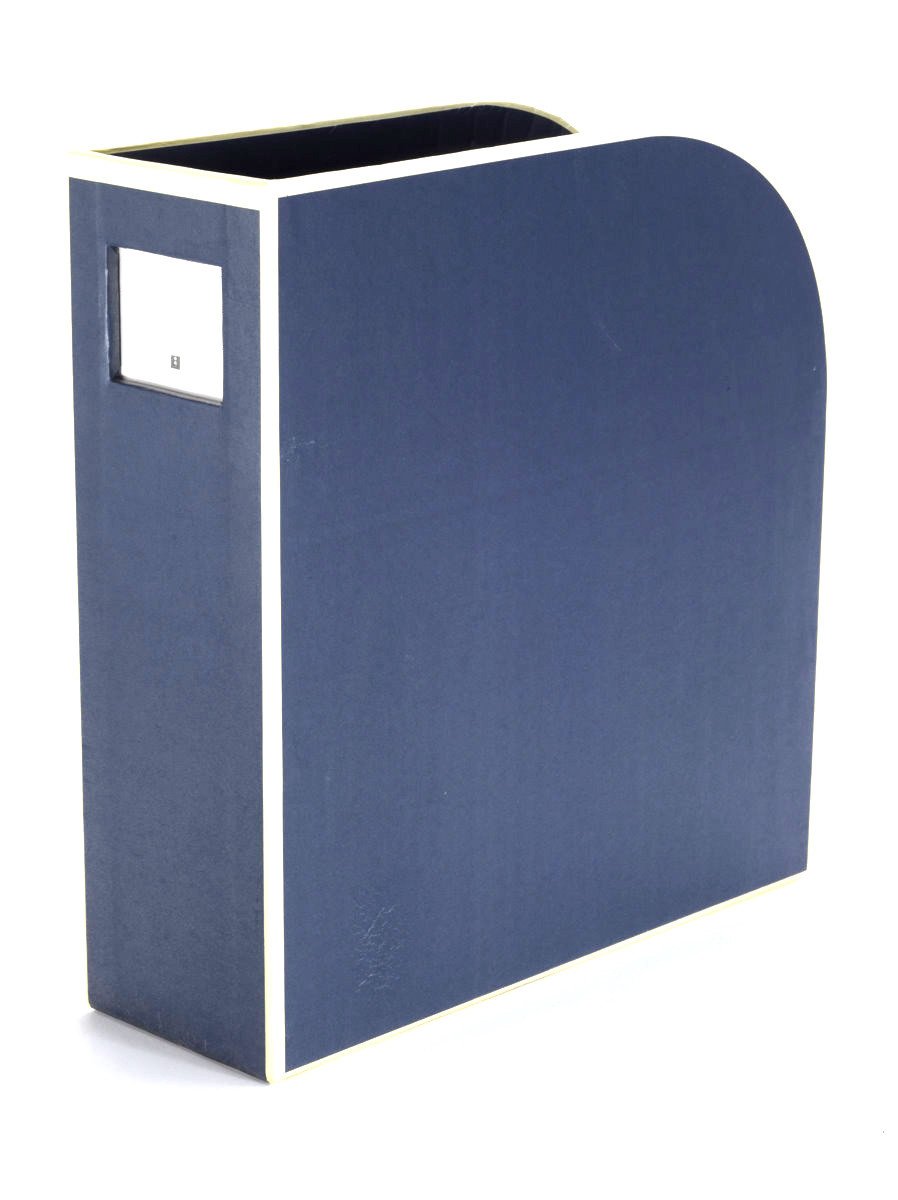
In case you are wondering, I do own just one other petunia pickle bottom item.  I needed an Ergo carrier when baby M arrived so I went with a petunia pickle bottom one.  It was actually only a little bit more than the regular Ergo carrier, but so much prettier!  Here is the one I have:


How do you make the switch from diaper bag to purse?  Or purse to purse?  Is it a free for all where everything just gets thrown in, or do you have a way to keep it all organized?  I'd love to hear!!

Monday, December 24, 2012

Sugar Cookies

There are so many traditions and fun activities to do during the holidays, but my favorite one of all is making cookies, specifically cookie cutter cookies.  Every holiday season my mom and I would transform the kitchen into cooking baking central where we would mix, frost, decorate, and best of all, sneak bites of cookie dough in between batches.  As an adult, holiday cookie baking has looked different for me every year. Some years I have made them at my mom's house or sadly made them on my own when we were living in San Diego (although that's not as fun, but can be made more joyful by blasting the Christmas music while baking) and one year I even got Nick to make cookies with me. Last year my friend Chelsea and her baby came over to bake with B and I:

Aren't they the cutest in their matching bib & apron!
Baya did a lot of tasting, but very little baking!

This year seemed a little more special than others.  The reason... 2 year old B is able to actually bake with me.  She has been helping me "make cookies" for a few months now and it warms my heart every time.  She gets her measuring cup and teaspoon and bowl and big spoon and she "mixes" her ingredients while I'm mixing mine.  She even sneaks bites of her cookie dough (which I woudn't recommend since I only give her the dry ingredients).

Before we started the cookie cutter process, we needed to make the dough and let it chill overnight in the fridge.

Making cookies is serious business!

2 year old B had to be sure she was wearing the proper attire.

This apron and hat were made by a teacher I used to work with.  She makes the most beautiful and adorable kitchen clothing and makes sure that all of us teachers with kids have matching bibs and aprons (see the photo of Chelsea above).

Baby M helped pick out which cookie cutters we were going to use.


Then it was time to start baking!  The girls and I spent the afternoon with my mom, friend Patsy, and even my dad took part in the decorating and frosting cookies.

The first step was to roll out the dough and cut out the cookies.


2 year old B quickly got tired of cutting out the cookies and enjoyed decorating the cookies much more.


Did I say decorating cookies?  I meant pouring decorations on the cookies.


Here is her very green and very sprinkled tree.


Even baby M tried to get in on the cookie decorating.


We decorated half the cookies and baked them and the other half we baked without decorations so we could frost them.  2 year old B chose 2 cookies that she frosted to death.  One for daddy and one for mommy... so sweet!

That's not chocolate frosting... Apparently B is into mixing colors!

Somebody learned how to sneak licks of frosting very quickly.


Everyone has their own favorite sugar cookie recipe.  Here is mine.


1 cup of butter
1 cup of sugar
1 egg
1/2 cup sour cream
1 tsp. baking soda
1 tsp. baking powder
2 cups flower

1. beat together butter & sugar
2. add the egg
3. first mix the sour cream and baking soda, then add to the butter, sugar, and egg mixture
4. add the baking powder and flour
5. the dough gets dry by the end so you will need to hand knead it to make sure it is all mixed together
6. wrap in plastic wrap and chill overnight
7. bake for 10 minutes at 350 degrees, but don't over bake them or you will have hard cookies and those never taste quite right

P.S. I don't save cookie cutter cookies just for the holidays.  One year I made special cookies for a few of my friends for a girls night.  Check out the martini glasses, red heel, and wedding dress for that bride-to-be:


Merry Christmas everyone!


Tuesday, December 18, 2012

Hand and Footprint Ornaments

At this time last year I was pregnant, sick 24/7, and exhausted.  My husband recently commented about how we didn't do many Christmas activities last year and I had to remind him that I was basically nonfunctional during the month of December.  There were a few good days, though, and on one of those days I spent a cozy morning with my moms group.  We attempted snow globes that fell apart almost immediately and then we all sat our kids around the table to make handprint ornaments.  With a bunch of 15 month olds running around, its amazing we got anything done, but with snacks and toys, we were able to keep them busy so we could chat and be crafty.


This year it was just the kids and I making the handprint ornaments, but my inspiration came from one of the moms from that group.  She made the cutest handprint ornament on a bulb with her son last year and so I decided to try the bulb handprint as well.  I started with 2 year old B and had this brilliant idea to use glitter over the paint, but it turned out looking like this:


Kind of funky looking, right?  So I started over.  2 year old B loved the feeling of the paint on her hand and she kept asking me to paint her again... and again... and again!


I had her hold her painted hand out and then I rolled the ornament over her hand.  I learned from a couple of tries that you need to do the handprint higher up on the ornament (like closer to the part that hangs) and that you need to start with the palm of the hand and roll up to the fingers.  I started with the fingers on one try and the palm didn't make a print.  I also discovered that baby wipes take the paint right off if you make a mistake so it was really easy to keep trying until I got a handprint that I liked.


Making baby M's handprint turned out to be impossible.  I painted baby M's hand and then she closed up that hand into the tightest ball that there was no way of even peeling the fingers apart to attempt a print.  So I ended up doing her foot.  I did the same process with the foot and started with the heel and pressed her foot around the upper part of the ornament.  It took a couple of tries, but I think it turned out pretty well.  Once I had a nice footprint, I wrote her name on the paint, but the black writing took something away from the cuteness of the ornament. 


Luckily I only wrote on one ornament so I was able to pull out those baby wipes again and make another footprint.  I made 2 ornaments for each kid.  One for us and one for grandma and grandpa.  Once they were dry I made name tags to attach to ribbon on the ornaments and voila, our 2012 hand and footprint ornaments are ready to be hung on the tree.  I thought about putting tinsel in the bulb to fancy them up a bit, but when I hung them on the tree they looked pretty enough with the lights shining through.


Sunday, December 9, 2012

Christmas Cards

11 months out of the year I could really care less about what comes in the mail.  In fact, if Nick is out of town and it is up to me to check the mail, I kind of forget about it.  Every once in awhile I get those nice surprises in the mail in the form of a thank you note or baby announcement or invitation, but usually what arrives in the mailbox is nothing to get excited about... until December!  My first card arrived Thanksgiving weekend (thanks Becky) and at that moment the holidays began.  I love each and every card and in the years past, I haven't been able to find a way to display all of them, but last year I found a solution to this problem.  In the entryway I hung shiny, skinny, silver ribbon and tied bells on the ribbon.  Then when I got a card, I inserted it between the slits in the bells like this...


Sometimes the cards fall out if the slits are too big, so I just add some of the paper from the envelope the card came in to the back of the card to make it thicker so that it will stick in there.  As the cards trickle in the display looks better and better, but right now, my display is looking a little empty.


A few days ago there was a post on one of my favorite blogs iheartorganizing that addressed just this issue.  The blog suggested using cutouts and ornaments to fill the empty space until more cards come in.  With going back to work and all the things that need to be done this time of year, I was trying to figure out when I could have some time to make pretty cutouts, but then while I was at Michaels I found these felt decorations...


They work perfect and make the card display look so festive!


Happy card season everyone!!

Friday, December 7, 2012

Weekly Menu: Back to Work I Go

When you live with someone long enough (and also happen to have 2 kids with them) its easy to look past all the good things.  Well, this week, my husband reminded just how great he is.  I went back to work this week after 5 glorious stressful interesting months at home with my 2 girls.  I stayed home for a whole year with my 2 year old and I am feeling like I have somehow cheated my 5 month old by not only going back to work after just giving her 5 months of me, but by only giving her 5 months of half of me since the other half of me was learning how deal with the emotional roller coaster of a 2 year old (more on that in a different post).  Going back to work is so hard and figuring out a new balance is even more difficult, but luckily for me, my husband didn't offer to, but just planned 4 meals that HE was going to cook this week.  Oh, and he went to the store.  If I sound like I'm bragging a little, I am... it was great!!  Here is what he cooked for us:

1. homemade pizza & roasted veggies

2. asian chicken salad & bread

3. chicken caesar salad & paninis

4. buttermilk pancakes, fruit, turkey sausage

Before the work week started we rode the Santa train where we had hot chocolate & cookies and the girls got to sit on Santa's lap.  Baby M cuddled right up to Santa's belly and snoozed and as usual, 2 year old B refused to smile, but at least there were no tears!


I am so grateful that Nick took charge of the meals so that I could just relax and play with these wonderful girls when I got home from work.

Thursday, November 29, 2012

This Week's Menu: A Dinnertime Moment

Nick and I make it a priority to eat together as a family.  Since we've had baby M, timing is everything to make sure that we can sit down and have a meal together.  Typically I prep dinner while Nick is playing with 2 year old B or doing something around the house.  Then when it is time to nurse, Nick will cook and by the time I'm finished nursing, dinner is ready and it is time to eat.  It sounds simple, but it takes a lot of thought and planning to make it all work.

Baby M is 5 months now and she's spacing out her feedings and taking less naps so suddenly I feel like dinnertime is less complicated and I can really enjoy the nights my husband does all the cooking.  On one particular night this week, 2 year old B was busy "washing dishes," baby M was cruising around in her activity center, Nick was cooking, and all I had to do was sit back and enjoy my family.


When the week started, there were a few nights that we weren't sure if we'd be home or not for dinner.  I decided to plan for 4 meals, leaving one take out night, and possibly 2 dinners with family.  Here is what I planned...

1. salmon, kale, bread

2. crock pot honey sesame chicken from The Comfort of Cooking (I put the chicken in the crockpot for too long and the chicken came out pretty dry so next time I need to follow the timing directions on the recipe), broccoli

3. breakfast sandwiches (we made them with asiago bagels from Panera - yum!), fruit, turkey sausages

4. Yakisoba with chicken, peppers, snow peas, and broccoli

The Yakisoba noodles come with a seasoning packet... so easy!


Friday, November 23, 2012

Office/Bar/Partial Playroom Project

We have this area in the house where we keep our wine fridge, bar items, books, office supplies, pictures, etc. and it opens up right into the playroom so it also functions as a partial playroom... you know, because filing, drinking, reading, and playing with the kids all go hand in hand, right?? The area needs A LOT of help, but I have a plan to make it functional.  Take a look at what it looks like now and what I'd like to do to change it:

I'm standing in the playroom that opens up into the office area in this picture... you can see how the space also functions as part of the playroom!


Yikes!  The tall bookshelf is not only an eye sore, but slightly dangerous.  The shelves are swaying and the back is falling off and for some reason it is leaning a bit toward the right.


In place of both the small & tall bookshelf, the black filing cabinet, and the unit in the corner that continues to have things piled on top of it, I want to get this unit from Ikea:
Before I start buying boxes and cubbies to go in the shelving unit, I need to think about how to organize the things I have.  If I don't really take some time to think about exactly what I need to organize, I'll go box crazy and buy way too much!  

There are some read for pleasure books, educational textbooks for me, and medical textbooks for my husband that will probably take up one whole row of shelves.  I REALLY need to organize the pictures, computer software odds & ends, and the greeting cards/stationary that are just kind of tossed in random places.  I think I'd like to use these to organize the pictures and computer software:


And possibly organize my greeting cards in this:

Paper and notebooks are another item that pile up and I never know what we've got.  I'd like to use these to be able to see everything easier:


I'm going to try these out for our files.  I'm thinking I'll start with 2 and go from there.

And finally, I need to have a place to put paperwork that needs to be filed, so I'd like to get this:

So that's my plan for now.  What do you think?  Stay tuned for the final product...